Summer Kitchen Cart assembly instructions (PDF)
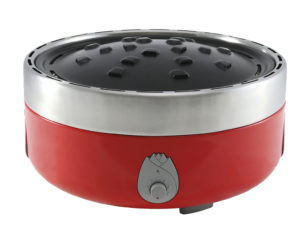
Gas burners D-300, D-400, D-500 use and assembly instructions (PDF)
Summer Kitchen cart care instructions (PDF)
SUMMER KITCHEN CART
Summer Kitchen carts are kept tidy and last longer with regular care. Sun, humidity, air pollution and temperature fluctuations affect the surfaces of carts. Regular cleaning, seeing to the condition of the surface treatment and proper storage help the carts to be preserved better. The best storage place during winter for carts is a dry, cool and ventilated space. In summer, the carts are stored the best under a shelter.
Wooden side tables for black summer kitchen carts:
The side tables are factory-painted with a water-soluble wood protective paint. Cleaning: With a moist towel, you can use a mild detergent for cleaning. Dry the wooden parts immediately after cleaning. You can patch up the paint coat of the side tables with black water-soluble wood protective paint. If the paint coat is damaged, sand the damaged paint off first and then paint the wooden surface with a wood protective primer. Last, paint with a paint suitable for outdoor use, either black matte or semi-gloss urethane paint or black wood protective paint. Store the cart in a dry place, protected from humidity, rain and sunlight.
Steel body parts and side tables painted black:
The steel parts are factory-painted black by powder coating. Cleaning: With a moist towel, you can use a mild detergent for cleaning. Dry immediately after cleaning Patch-up paint: Wash the area to be painted and sand using thin emery paper. Remove grinding dust and paint with black matte polyurethane paint, for example. The repainting must be done according to the paint manufacturers’ instructions.
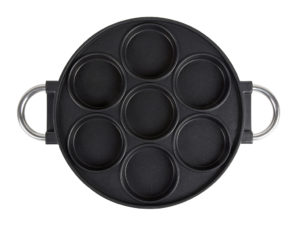
MUURIKKA PAN:
Proper care makes Muurikka Pan your lifetime partner. Even though the Muurikka Pan is made of sturdy iron, it also needs a little care. With these instructions, you can keep your pan in good shape for years and avoid rust.
Taking a Muurikka Pan into use
Clean the new pan by washing it with a mild cleaner or hot water and season the pan immediately after cleaning as follows: Heat the pan hot on a gas burner, electric grill or campfire and apply a thin and even layer of Muurikka Silava Frying Fat or oil throughout the pan surface. The fat must not trickle thickly onto the pan bottom because, if it lumps, the fat will burn into an uneven mass. Apply a few layers of fat and wait for the fat to be sucked up before use. The fat will darken and dry onto the pan, at least at the centre of the pan. The pan will darken further in use and gain more patina.
Cleaning
Always clean the pan after use. The best results are achieved by cleaning the pan immediately after use. Pour a drop of water on the pan, bring it to boil and clean the pan with a spatula and paper towel. Wipe the pan dry and grease the frying surface lightly with cooking oil or salt-free Muurikka Silava Frying Fat.
Storage
Before long-term storage, clean, dry and grease the pan by heating it with Muurikka Silava Frying Fat (heating will remove moisture from the pan and Silava Frying Fat will prevent rust). Store the pan in a dry place.
If your Muurikka Pan is rusty
If the pan has been exposed to moisture during storage and is rusty, don’t worry. Scrub the pan with steel wool or grill brush, clean and season it according to the instructions on taking a Muurikka Pan into use. This way, your pan will be good to go again.
Old salt tip
When your Muurikka Pan is dirty or you want to clean the pan between dishes with different tastes, salt is a good trick. Spread salt generously on the Muurikka Pan and keep a low heat on for a few minutes. The salt will suck up fat, moisture and stains. Once the stains have been sucked up, scrape the salt off with a spatula, for example, pour a drop of water on the pan and wipe the pan clean. Last, remember to dry and grease the pan well. This way, your Muurikka Pan will be as good as new again.
Reviews
There are no reviews yet.